Introduction
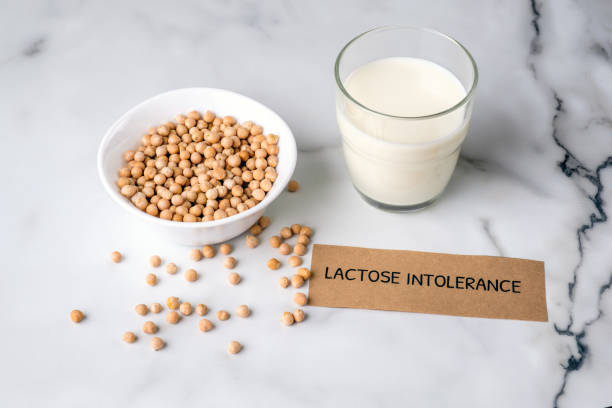
In recent years, the demand for dairy-free alternatives has surged, driven by health-conscious consumers and those with lactose intolerance or dairy allergies. Creating your dairy-free milk at home not only allows you to tailor flavors to your liking but also empowers you to control the ingredients. This comprehensive guide will walk you through the steps of making dairy-free milk, exploring a variety of plant-based options that are not only delicious but also rich in nutrients.
Choosing Your Base
The first step in crafting dairy-free milk is selecting a base ingredient. Popular choices include almonds, cashews, oats, coconut, soy, and rice. Each base offers a unique flavor profile and nutritional benefits. Almonds and cashews provide a creamy texture, while oats offer a heartier consistency. Coconut milk is known for its rich taste, while soy milk is a protein powerhouse. Rice milk, on the other hand, is a light and neutral option. Consider personal preferences and dietary needs when choosing your base.
Soaking and Blending
Soaking your chosen base is crucial for achieving smooth and creamy dairy-free milk. This step softens the nuts or grains, making them easier to blend and extract flavors. Soak your base overnight or for a few hours before blending. Once soaked, combine the floor with fresh water in a high-speed blender. The ratio of base to water will depend on the desired thickness of your milk. Blend until the mixture is smooth, ensuring that no gritty texture remains.
Straining and Flavoring
To achieve a silky texture, strain the blended mixture using a nut milk bag, cheesecloth, or a fine mesh sieve. This step separates the liquid from the pulp, resulting in smooth, dairy-free milk. Save the leftover pulp for baking or smoothies to minimize waste. Now, it’s time to add flavor! Sweeten your milk with natural sweeteners like dates or maple syrup, and enhance the flavor with a pinch of salt or a dash of vanilla extract. Experiment with different flavor combinations to find the perfect balance for your taste buds.
Storing and Enjoying
Once your dairy-free milk is ready, transfer it to a clean, airtight container for storage. Refrigerate and shake well before each use, as homemade milk may naturally separate over time. Enjoy your dairy-free milk in a variety of ways – pour it over cereal, use it in coffee, or incorporate it into cooking and baking recipes. Get creative by adding flavors like cinnamon, cocoa, or turmeric for an extra kick.
Conclusion
Crafting your dairy-free milk at home is a rewarding and customizable experience. By choosing your base, soaking, blending, straining, and flavoring, you can create a delicious and nutritious alternative to traditional dairy milk. Experiment with different ingredients and ratios to find the perfect blend for your taste buds. Not only does homemade dairy-free milk provide a healthier option, but it also allows you to contribute to a sustainable and eco-friendly lifestyle. Embrace the versatility of plant-based milk and savor the satisfaction of a DIY approach to a dairy-free delight.