Introduction:
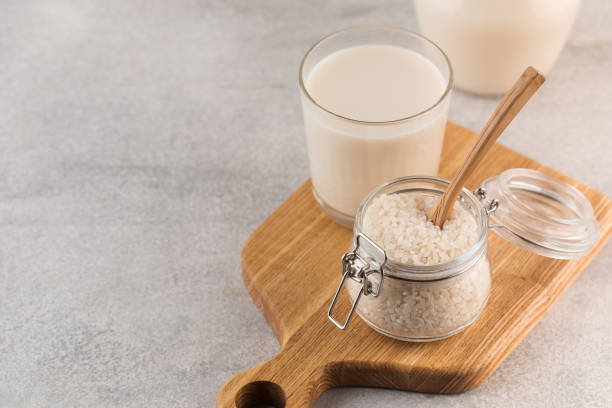
Rice milk is a versatile and dairy-free alternative to traditional cow’s milk. It is a perfect option for those who are lactose intolerant, allergic to nuts or follow a plant-based diet. Making rice milk at home is not only cost-effective but also allows you to customize the flavor and sweetness to suit your preferences. In this comprehensive guide, we will walk you through the step-by-step process of making delicious and nutritious rice milk in the comfort of your kitchen.
Ingredients:
- 1 cup of uncooked rice (brown or white)
- 4 cups of water (for soaking)
- 4 cups of filtered water (for blending)
- Sweetener of your choice (optional): maple syrup, agave nectar, or honey
- Vanilla extract (optional)
- Pinch of salt
Equipment:
- Blender
- Fine mesh strainer or cheesecloth
- Bowl
- Storage container (glass jar or bottle)
Rinse and Soak the Rice
Begin by rinsing one cup of rice under cold water to remove excess starch. Place the rinsed rice in a bowl and cover it with four cups of water. Allow the rice to soak for at least 2 hours or, ideally, overnight. This softens the rice and makes it easier to blend.
Blend the Rice
After soaking, drain the rice and transfer it to a blender. Add four cups of filtered water, a pinch of salt, and any sweeteners or flavorings you desire, such as vanilla extract. Blend the mixture on high speed for 2-3 minutes until it becomes a smooth, creamy liquid.
Strain the Mixture
To achieve a smooth texture, strain the blended rice mixture using a fine mesh strainer or cheesecloth. Place the filter over a bowl and pour the rice milk through it, allowing the liquid to separate from the rice pulp. Use a spoon to press down on the remaining pulp to extract as much liquid as possible.
Sweeten and Flavor (Optional)
Taste the strained rice milk and adjust the sweetness or flavor to your liking. You can add more sweetener, vanilla extract, or other flavorings at this stage. Blend briefly to incorporate any additional ingredients.
Store the Rice Milk
Transfer the strained and flavored rice milk into a clean glass jar or bottle with a tight-fitting lid. Store it in the refrigerator for up to 4-5 days. Remember to shake the container before each use, as rice milk may naturally separate over time.
Utilize the Rice Pulp
Don’t discard the leftover rice pulp! It can be repurposed in various recipes, such as smoothies, baked goods, or as a base for rice porridge. Reduce food waste by finding creative ways to incorporate rice pulp into your cooking.
Conclusion:
Congratulations! You’ve successfully made homemade rice milk. Enjoy this nutritious and dairy-free alternative in your morning coffee, cereal, or as a standalone beverage. Experiment with different flavorings and sweetness levels to create a rice milk that suits your taste preferences. Making your rice milk not only empowers you to control the ingredients but also contributes to a more sustainable and eco-friendly lifestyle. Cheers to your culinary adventure in plant-based milk-making!